10 Home Decluttering and ‘Micro-Tidy’ Tips From an IKEA Expert

I think we can all admit IKEA reigns supreme when it comes to storage. So who better to talk to than an IKEA interior decorator to find out how to achieve that elusive, but supposedly attainable, clutter-free home?
IKEA has recently revealed a new concept as the secret to organizing every space in the home: the micro-tidy. The art of the micro-tidy is a bite-sized, time sensitive approach that reduces stress, time, and focus needed to overcome tidy procrastination and help us achieve that goal!
Amy Hare, IKEA Interior Designer, has explained exactly how to do a “micro-tidy” in your own home with these 10 home decluttering tips.
1. Make the Time
According to a recent IKEA survey, 42 percent of people say they simply don’t have the time to embark on a declutter. However, schedule the time in advance so you stick to it — even if it’s tackling 15 minutes at a time!
2. Decide On a Room and Area
For example, if you decide on the kitchen then start with the pantry. Or if you decide on the bedroom, start with one area such as the closet or bedside table. Don’t forget to take your “before” photo!
3. Make a Plan
Sit down with a cup of tea and write down the items you have and categorize them. For example, if it’s the pantry, categorize them into spices, grains and pasta, canned food etc.
4. Group By Frequency Of Use
Now that you have your categories, it’s time to group these by how often you might use them. For example, group items you reach for the most like socks and underwear in the closet or condiments such as salt and pepper and cereal in the pantry. Then group less frequently used items together such as any double-up products from the pantry or bathroom, or seasonal and old coats.
5. Identify Your Storage Solutions
Now it’s time to start thinking about the best storage solutions for the groups you have made. For example, use smaller containers with handles for items you reach for every day in the pantry and ensure they are at eye-level and easy to reach. Use big, open containers for heavy bulk items and store these at the bottom of the pantry. For the closet, use drawer dividers for everyday items such as socks and underwear, and keep seasonal clothes at the top of your closet in vacuum sealed bags.
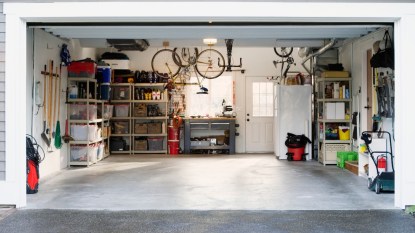
6. Keep an Eye Out For Under-Utilized Storage Space
It’s important to keep an eye out for extra storage spaces that we might not think of when organizing. For example, under the bed, behind the door, and utilizing the wall space with open shelving.
7. Label
Once you have your storage solutions identified, it’s time to get labelling so you can easily keep an eye on what you have stored. This is a great way to avoid purchasing double-up items as well as keeping everything stored in its place. For the pantry, label items if they are not in clear containers and be sure to write the expiration date on the label too. For the closet, use hang tags on boxes to know where your items are.
8. Replenish
For the pantry and bathroom, make sure you are aware of expiration dates and take note if any products are no longer able to be used.
9. Start Organizing
Now that you have your groups and storage solutions, it’s time to start organizing all your items. It’s important to tackle one section at a time — whether that’s one pantry shelf, one closet drawer, or one group like dresses. These home decluttering tips should make this a much easier task to accomplish.
10. Snap an After Photo
Now that everything is organized, it’s time to take that “after” photo for your Instagram makeover post!
This article originally appeared on our sister site, First For Women.