Simple Nail Designs You Can Do Yourself That Will Wow All Summer
It's easier than you think!
It’s manicure season, and despite social distancing restrictions at nail salons, there’s no reason your nails can’t look summer-ready. These simple nail designs can be created by you, at home, with tools you probably already have. Let these step-by-step nail art guides inspire you.
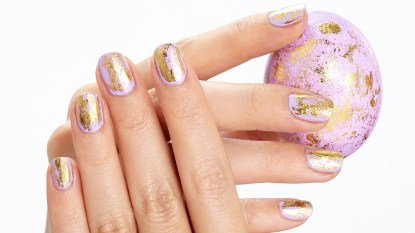
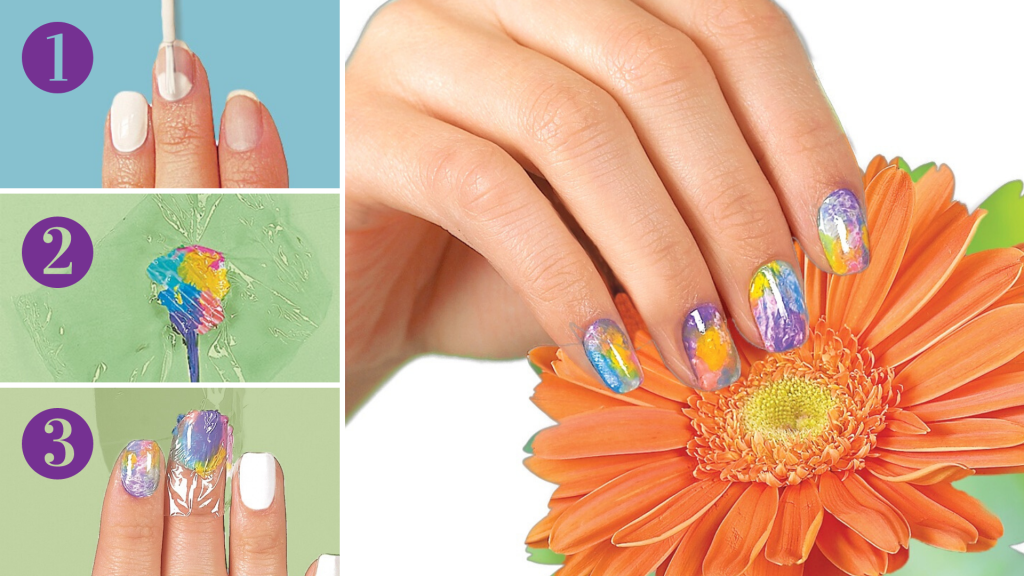
Wow-worthy watercolor
You’ll need:
- White, pastel yellow, purple, pink, blue and green polishes (like Gellen 16 Colors Gel Nail Polish Set, $29.99, Amazon)
- Clear top coat (like SinfulColors Nail Polish Clear Coat, $6.22, Amazon)
- Plastic wrap
- Cotton swabs
- Nail polish remover
STEP 1: Cut 10 (2″) squares of plastic wrap and set aside. Then paint nails with two coats of white polish; let dry completely.
STEP 2: Paint overlapping swipes of yellow, purple, pink, blue and green polishes onto one square of plastic wrap.
STEP 3: Immediately press the painted square over one nail and smooth it down so all of the colors transfer. Peel off the plastic and repeat on remaining nails. Dip a cotton swab into polish remover and use to clean off excess polish on skin around nails. Let dry; seal nails with clear top coat.
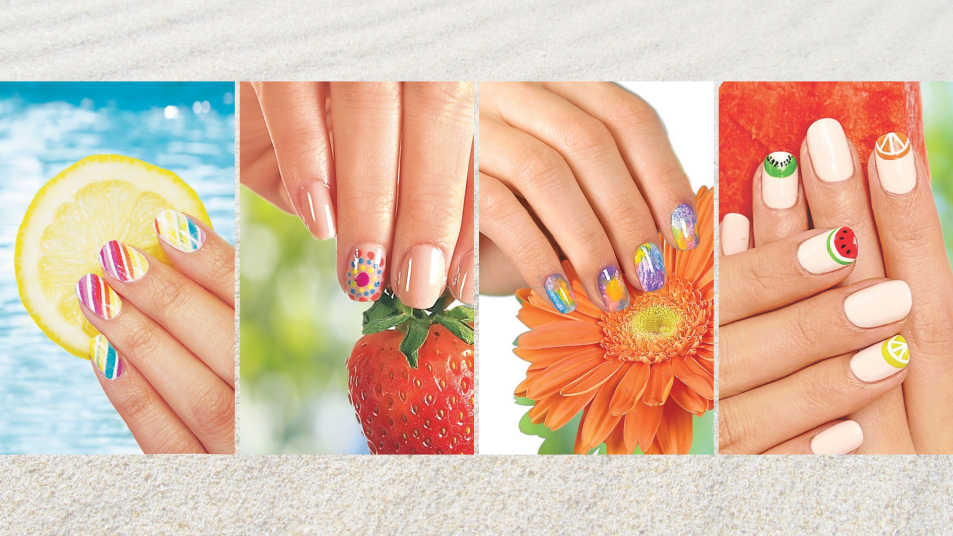
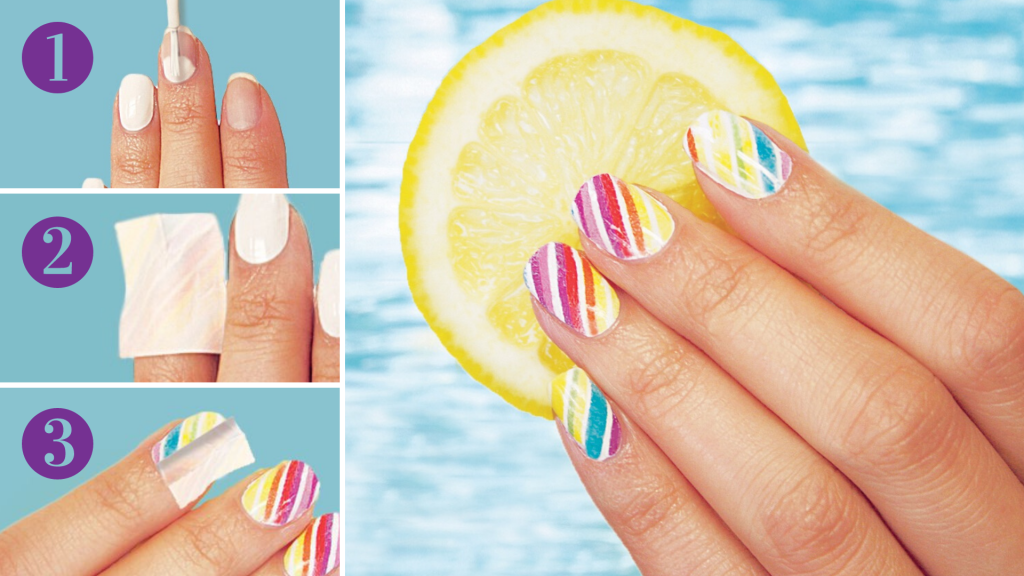
Splashy rainbow stripes
You’ll need:
- Striped rainbow wrapping paper (like Multicolor Wide Stripe Wrapping Paper Roll, $5, WorldMarket)
- White nail polish (like Essie Nail Polish, Glossy Shine Finish in Blanc, $8.28, Amazon)
- Tweezers
- Rubbing alcohol
- Clear top coat
STEP 1: Cut striped gift wrap paper into 10 (3⁄4″) squares and set aside.
STEP 2: Paint all nails two coats of white polish then let dry completely.
STEP 3: Submerge one paper square in a small bowl of rubbing alcohol and remove it with tweezers, then place the paper on a nail (design side down) with the stripes running diagonally. Gently press down on the paper so the design comes in contact with the entire nail. Wait 10 seconds, then gently peel off the paper to reveal the stripes. Repeat on each nail and let dry; seal nails with clear top coat.
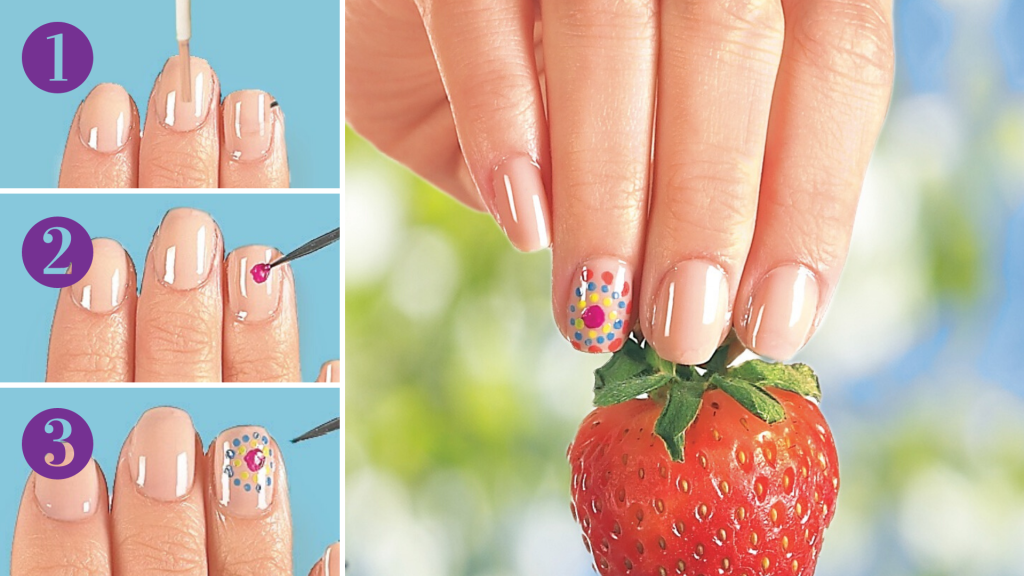
Kaleidoscope swirls
You’ll need:
- Opaque nude polish (like Orly Breathable Nail Polish in Nourishing Nude, $8.99, Amazon)
- Bright purple polish (like China Glaze in Purple Panic, $8, Amazon)
- Dotting tool (like Beaute Galleria 5 Piece 2-Way Dotting Pens Nail Art Design, $8.99, Amazon)
- Pastel yellow, blue and pink polishes (like Gellen 16 Colors Gel Nail Polish Set, $29.99, Amazon)
- Clear top coat
STEP 1: Paint two coats of nude polish onto nails and let dry completely.
STEP 2: Dip a dotting tool into a bright purple polish and create one large dot in the center of the ring finger nail.
STEP 3: Create a circle of smaller dots around the large dot with yellow polish. Continue making swirls of dots with blue, then pink polish. Let dry; seal all nails with clear top coat.
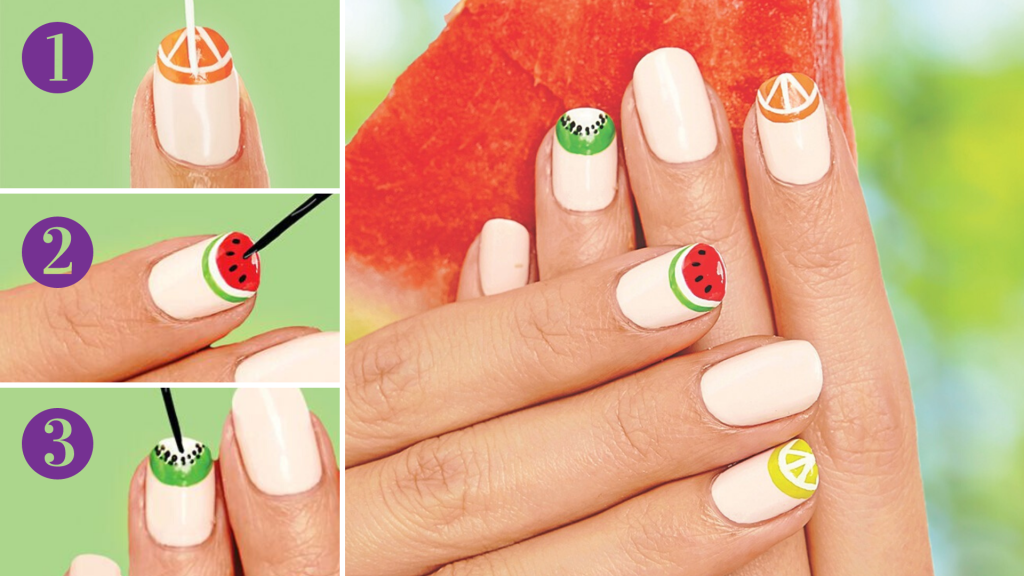
Fruity French tips
You’ll need:
- Light pink opaque polish (like Essie Nail Polish in Fiji, $7.87, Amazon)
- Black, white, orange, yellow, red and green nail art striper polishes ($4 each, ColorClub.com)
- Clear top coat
STEP 1: Apply two coats of light pink polish to nails and let dry.

STEP 2: Orange and lemon: Use an orange striper polish to draw a half-circle at the nail’s tip, then use a white striper polish to draw a half-circle line and three angled lines over it. Repeat with yellow polish to make a lemon.
STEP 2: Watermelon: Use a red striper polish to draw a half-circle at the nail’s tip, then outline with white and green striper polishes. Use black striper polish to dot on seeds.
STEP 3: Kiwi: Use a green striper polish to draw a half-circle at the nail’s tip, then use a white striper polish to make a smaller semicircle inside. Use black striper polish to dot on seeds. Let dry; seal nails with clear top coat.
This story originally appeared in our print magazine.