Studies Show Crafting Boosts Mood + Reduces Dementia Risk: 6 Easy Paper Crafts to Help You Get the Perks
Create impressive paper keepsakes — in as little as 10 minutes!
Crafting is a fantastic way to unlock your creative side. Not only do you end up with an impressive project when you’re finished, it also provides a mood boost that leaves you feeling great. Keep reading for more reasons to consider creating your own handmade projects, then get the easy how-to for six of our favorite paper crafts you can try right at home.
3 benefits of crafting
Making your own crafts and homemade keepsakes is more than just a great way to pass the time. There are countless well-being benefits from those creative endeavors, as well!
1. It’s good for your brain
In fact, researchers in the journal JAMA Network Open found that crafting can help your brain stay sharp. They analyzed data for 10,318 older adults and discovered that crafting and other creative endeavors reduced the risk of dementia over the course of a decade. The researchers say creative activities stimulate the brain by boosting problem-solving skills, hand-eye coordination and spatial awareness.
2. It’s good for your mood
Crafting can also give you an instant mood lift, suggests a study in the British Journal of Occupational Therapy. In the study, 81% of people reported feeling happier after knitting — and the more they did it, the happier they were.
That’s because the repetitive, rhythmic motions required for crafts like knitting, jewelry-making and painting block the activity of stress hormones, bringing on bliss. “Concentration on crafting with our hands allows us to become absorbed in our project to the point where we can let our worries go and just focus on what we are making,” adds Julie, who shares crafting tips and tricks at Julie Measures.

3. It’s good for your confidence
Another great perk: Working on a craft project is a great way to boost your self esteem — no matter your skill level. “Finishing a project gives you a sense of satisfaction,” says Julie. “Visualizing your project and then seeing that project through to completion gives you a sense of satisfaction, pride and achievement.”

Easy paper crafts to try
Any type of crafting will provide you with the perks mentioned above. But if you’re looking for easy crafts using inexpensive supplies and items you may already have around the house, keep reading for easy paper crafts you can do right at home. All it takes to turn gift wrap, cardstock and scrapbook paper into keepsakes is a few quick cuts and folds!
Cottage-chic serving tray
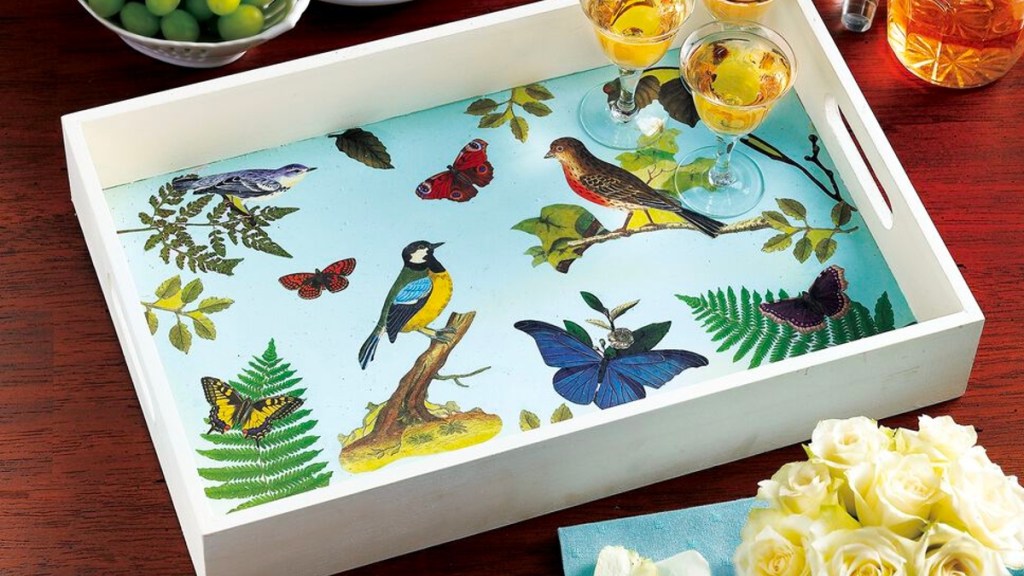
“Celebrate nature’s beauty with a stylish serving tray made extra special with bird, butterfly and botanical motifs snipped from scrapbook paper!” says Lauren Blum, Woman’s World crafting and DIY editor. (When you’re ready to use your tray, consider serving this delicious Berry-Orange Sangria.)
Supplies:
- 1 unfinished wood tray (our tray is 12″x18″)
- Chalky matte finish paint from the craft store (in light blue and creamy white)
- Botanical, bird and butterfly patterned scrapbook paper
- Decoupage paste
- Craft-store gloss varnish
How-to:
Step 1: Paint the inside bottom of the unfinished wood tray with two coats of the light blue chalky-finish paint. Next, paint the rest of the tray with two coats of the white chalky-finish paint. Let the tray dry between each coat and after the second coat of paint.
Step 2: Use sharp scissors to carefully cut butterfly, bird and leaf shapes out of the patterned scrapbook paper. Plan out the placement of the paper cutouts on the inside of the tray, as shown. Arrange the larger paper bird cutouts first, then fill in with the smaller butterfly and leafy or botanical cutouts.
Step 3: Brush decoupage paste onto the back of each cutout shape, then smooth them one at a time onto the tray in the desired placement. Let dry for about 2 hours. To finish, lightly brush a coat of varnish on the entire tray to seal the paper design and protect the paint from chipping or getting damaged; let dry fully before using.
Heartwarming memory boxes
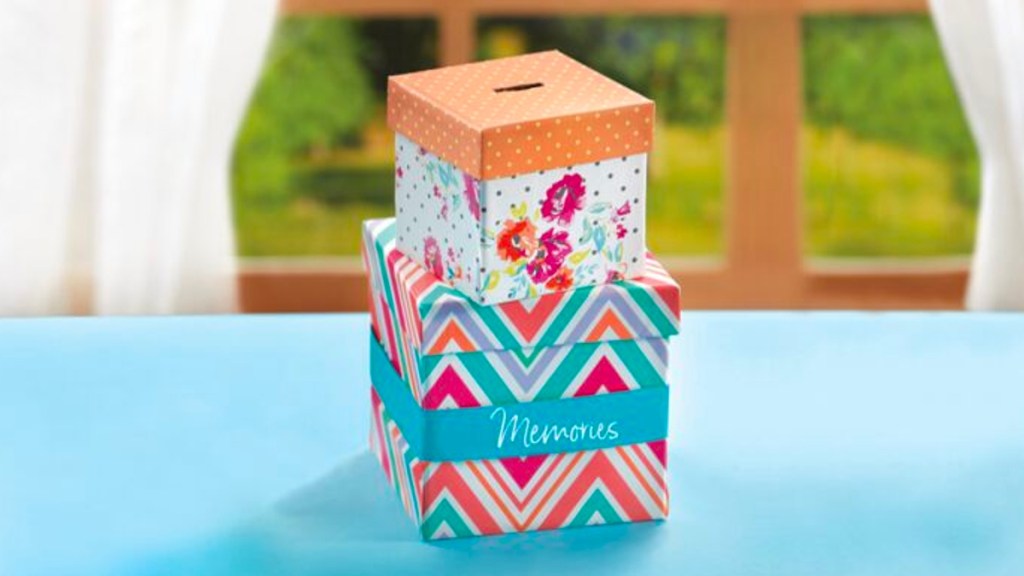
“These cheery paper-covered boxes pretty up any surface and collect happy memories that you can reflect on whenever you need a little lift!” says Blum.
Supplies:
- 2 small cardboard boxes with lids
- Patterned gift wrap
- Scissors
- Glue
- Sheet of blue paper
- White paint pen
How-to:
Step 1: For each box, remove lid and set the box on table. Cut four squares of gift wrap to fit all four sides of the box. Apply glue to the back of each square and press onto the box. Let dry.
Step 2: Cut an extra square of paper to fit the bottom of the box and attach with glue. Next, cut and glue more wrapping paper to cover all sides of the box top; let dry.
Step 3: Carefully cut a slit in the box top. Snip a strip of solid-colored paper into a long band; attach around box using glue stick.
Step 4: Write “Memories” on the band using white paint pen. Throughout the year, jot down sweet moments and memories on slips of paper and insert in box. Open box and read whenever you need a mood boost!
Eye-catching bookmarks

“These sweet, simple place savers make curling up with a book even more enjoyable!” teases Blum. (Looking for a new read? Try one of these historical fiction books.)
Supplies:
- Scissors
- Balsa wood sheet
- Hobby knife
- Scrapbook paper
- Hole punch
- Craft glue
- Clear craft “gloss”
- Small charm
- Ribbon
How-to:
Step 1: For each, cut a 2″ square out of a sheet of balsa wood using hobby knife. Then snip scrapbook paper into 2″ square; align squares and punch a hole in the top.
Step 2: Glue paper to wood square; let dry. Coat front and back of the square (avoiding hole-punched area) with craft gloss. Let dry.
Step 3: Snip three 12″-long pieces of ribbon. Hold pieces together and thread a small craft-store charm on each. Insert ribbons through the hole, braid and knot at the top to secure.
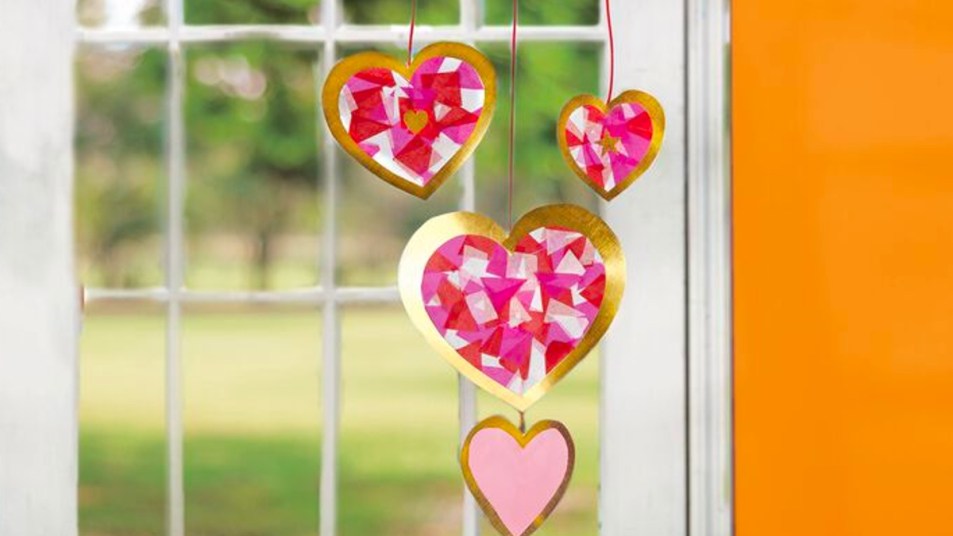
Shimmering suncatcher

“Add a lovely glimmering greeting to any window in your home with these heart-shaped suncatchers — made from 3 kinds of paper!” says Blum.
Supplies:
- Scissors
- Tissue paper (in pink, red and white)
- Gold scrapbook paper
- Clear contact paper
- Thin red ribbon
- Tape
How-to:
Step 1: To make each suncatcher, cut sheets of pink, red and white tissue paper into 1⁄2” squares. Then fold a sheet of gold paper in half and cut out a heart shape. While the heart is folded, make a parallel cut 1″ inside the heart, forming a cute heart-shaped “frame.”
Step 2: Open up the folded heart frame and center it on a piece of clear contact paper, sticky side up. Next, add a small gold shape (like a heart or star) to the center of the sticky paper; surround with tissue paper squares until fully covered.
Step 3: Once the center of the heart is covered with paper squares, stick another sheet of contact paper over the heart; cut away excess contact paper. Use pieces of tape to attach hearts to lengths of ribbon. Tape a small heart with a solid pink center to the bottom of one ribbon. Hang sun catchers on or near a window.
Joy-on-the-go travel journal
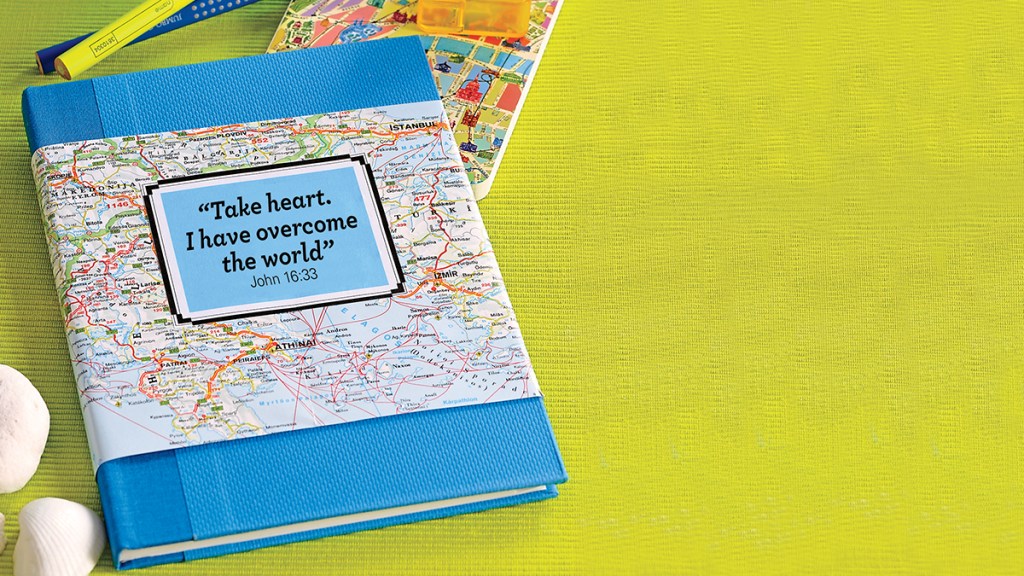
“A notebook goes from simple to striking when it’s wrapped in a colorful paper map,” says Blum. “Document special moments on trips or use it as an everyday journal!”
Supplies:
- Blank journal or notebook
- Old paper map or atlas
- Craft glue
- Craft-store removable glue dots
- Cardstock (in white and blue)
- Marker or paint pen
How-to:
Step 1: Open the book and lay it facedown, pages spread out. Measure the book from left to right and cut a wide band from a map to this measurement, plus 2″ extra on each side. (So if your book is 10″ when spread, you’ll cut a 14″ band.)
Step 2: Lay the map band facedown on a table and center the open book on top. Next, apply removable glue dots to the corners of the map; fold the map over the front and back inside covers of book and press down on the dots to stick.
Step 3: To create the label, snip a piece of white cardstock into a 3″x4″ rectangle. Apply glue to the back of the cardstock and press onto the map. Next, cut a piece of blue cardstock into a smaller rectangle and glue on top of the white rectangle.
Step 4: Jot down a favorite travel quote (like “Life is a journey, not a destination.” —Ralph Waldo Emerson) on the label using a black marker or paint pen. Let dry. Use the journal as a travel diary or everyday journal.
Lovely little paper apples
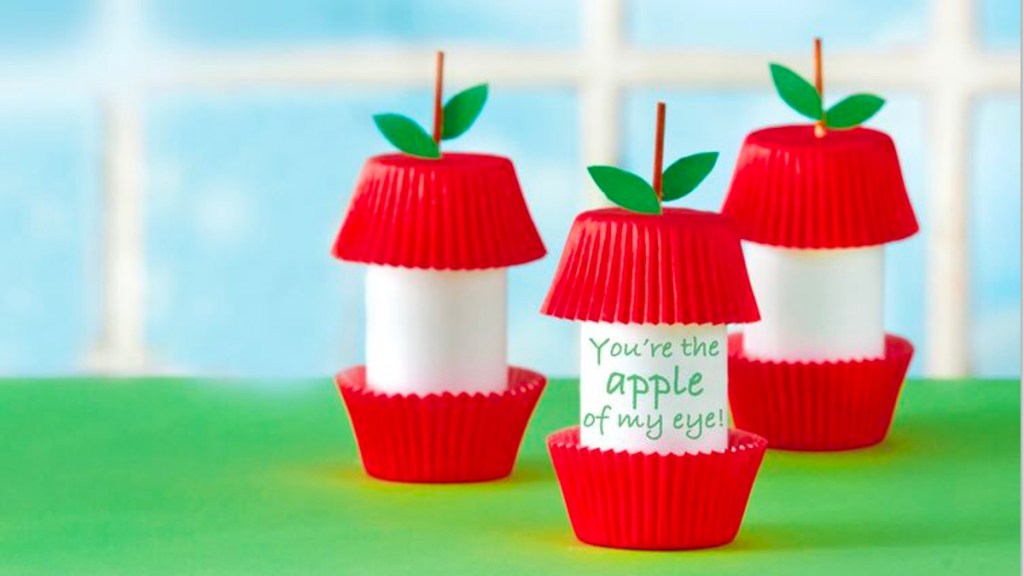
“You can spend time with the ‘apples of your eye’ while making these simple desk toppers,” suggests Blum.
Supplies:
- Scissors
- Scrapbook paper (white and green)
- 1 cardboard tube
- Permanent marker
- Glue
- 1 wooden kitchen skewer
- Brown craft paint
- Paintbrush
- 2 red cupcake liners
How-to:
Step 1: To make each, cut a piece of white paper to fit around a cardboard toilet-paper tube. Write “You’re the apple of my eye” on the paper with a marker. Wrap the paper around the tube, attaching with a few dots of glue; let dry.
Step 2: Next, cut a wooden skewer to 1½”. Add one or two coats of brown craft paint to the skewer and let dry.
Step 3: Apply glue around the base of the cardboard tube, then press into a red paper cupcake liner. Add glue around the tube’s top; press an overturned cupcake liner onto it. Press skewer into the center of the top cupcake liner, creating a stem.
Step 4: Finish by snipping two small leaf shapes out of green scrapbook paper and gluing each to the stem.

For fun crafting party ideas, keep reading!
How to Throw a ‘Paint and Sip’ Party at Home — Pro Tips Make It So Easy + Fun
How to Host a ‘Vision Board’ Party: Pro Tips Make It Simple, Fun and Inspiring!
Pro Tips to Throw a Wreath-Making Party + Ensure Your Creation Lasts All Season!


