6 Pro Tips for Building a Sand Sculpture — and the 1 Thing You Should *Never* Do
Plus: the surprising 'tools' you'll want to bring to make your sand sculpture even better!
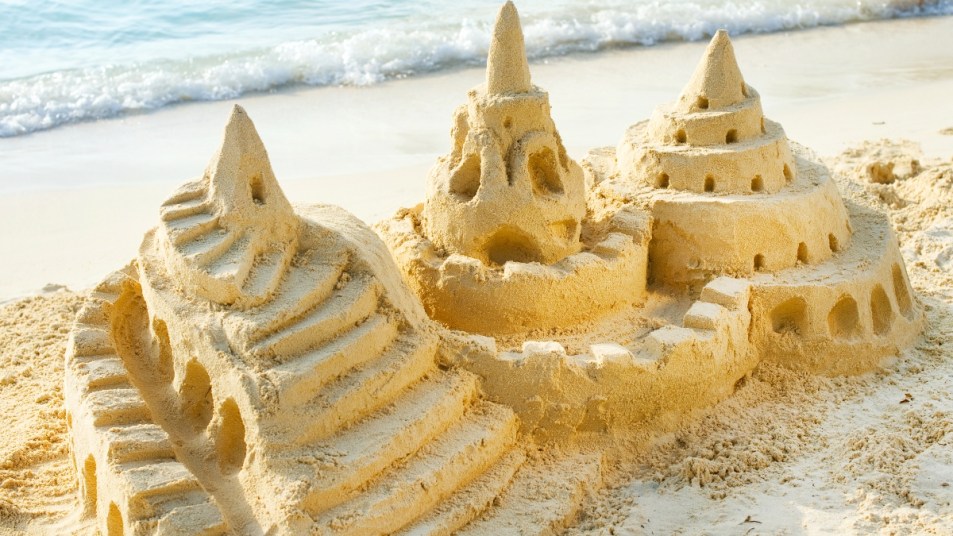
Sandcastles aren’t just for kids! Spending a day at the beach creating a sand sculpture is a great way to unleash your inner artist and have some extra fun. We asked four professional sand sculptors — all of whom wow crowds all over the country with their creations — how to make the best sand castle. Below, they share the best spot to get building, which kitchen (and beauty!) tools are a must-have and more.
1. Keep things wet
There are only two ingredients you need to get started on a great sandcastle or sculpture: sand and water. When it comes to water, more is always better!
“Water is the glue,” says Arscott. “On the beach, it is literally impossible to put too much water because it’s always going to be draining through right back into the beach.”
Though you need a lot of water to help with the formation, you don’t need to constantly be carrying buckets of it over to your sculpture. You can actually bring a spray bottle and spritz your creation with water as you work to ensure the sand granules stick together. “The more moist it is, the easier it is to build,” adds Jill Harris of Sandsational Sand Sculpting.
2. Find the best spot for your sand sculpture
“You want to build in the wet sand and have the tide be going out,” advises Greg LeBon of Archisand Professional Sculptors. (Tip: Use the Tide Alert app on iPhone or NOOA Weather & Tides App for Android to determine the tides near you.) The last thing you want is for the water to wash away all of your handiwork! But starting on wet sand means less work for you as you sculpt.
Also smart: Ensure the back of your sculpture is toward the water, says Dean Arscott, a professional sand sculptor with Team Sandtastic (check out some of his work here) “So when you’re taking your final shot, you’ve got the nice pretty ocean in the background, not the parking lot of the beach.” (Click through to learn how to make money from your photos)
3. Follow a ‘pancake’ building pattern
No matter what kind of structure you decide to make, you’ll need a great foundation to get started. The secret to success: Form wet sand into giant pancakes, advises Harris. To do: Use wet sand to form tightly packed 1-inch thick circles, building one on top of another. “Sand is easier to stack if it’s flat,” she notes. Then use your hand to smooth the pancakes together, or simply fill in the gaps with more wet sand.
4. Bring the right tools
Once you have formed the shape of your sand sculpture, it’s time to start adding details. Thankfully, there are a number of tools you can find laying around that can come in handy.
Marianne Knight, co-owner of sand-sculpting company The Sand Lovers, LLC, says packing a few kitchen tools in your beach bag can help you build a masterpiece: Spoons are ideal for digging in small areas, butter knives for cutting out squares, spatulas for shaping and straws for blowing off loose sand. “And paint or cosmetic brushes are wonderful at smoothing surfaces,” she adds.
Another kitchen tool to consider bringing along: a melon baller. “We use this to make round and arched windows,” says Lebon.
If you have any cake decorating tools, the pros say they are quite versatile, as well.
5. Work from top to bottom
Your sculpture is built and your tools are on hand so you can begin adding impressive elements and textures. The trick to making things less tedious for you? Focus on the details at the top of your sculpture first.
“All the excess sand you carve out is going to fall toward the bottom and you don’t want to have to carve it again,” says Arscott.
For example, if you add a window at the bottom of your sand castle and then try to carve a door above it, sand will fall down and fill in what you just did!
6. Avoid making “fixes”
If you come up with an idea for a tweak or additional detail on your sand sculpture, it can be tempting to make a change. But Knight cautions against this: “Once you’re done with an area, don’t go back to touch up: The sand tends to dry out, and it will crumble.” Leaving what you already did alone will ensure your structure stays sturdy.
Worried about crumbling happening in the areas you haven’t worked on yet? Use that spray bottle to spritz the sandy spots that are getting lighter in color. “If you can keep some wet, you’ll maintain the detail longer,” adds Lebon.
A version of this article originally appeared in our print magazine, Woman’s World.

For more secrets to a great beach day, keep reading!
5 Tips for a Stress-Free and Relaxing Day at the Beach
3 Beach Bag Must-Haves That Will Help You Make the Most of This Summer