How to Dry Flowers so You Can Have Beautiful Bouquets All Year Long
Bouquets of dried roses and baby’s breath can make for beautiful decorations in your home all year — but only if you know how to dry flowers the right way. Fortunately, it’s pretty easy to dehydrate flowers all by yourself. Whether you want to learn how to dry flowers at home so you can continue to treasure a surprise bouquet from your husband, or you just want to enjoy the flowers from the backyard long after the last bloom, most flowers can be dried easily. To help you become an expert on how to dry flowers properly, we’ve rounded up the easiest ways to preserve your blossoms, including how to dry flowers in the oven and the microwave.
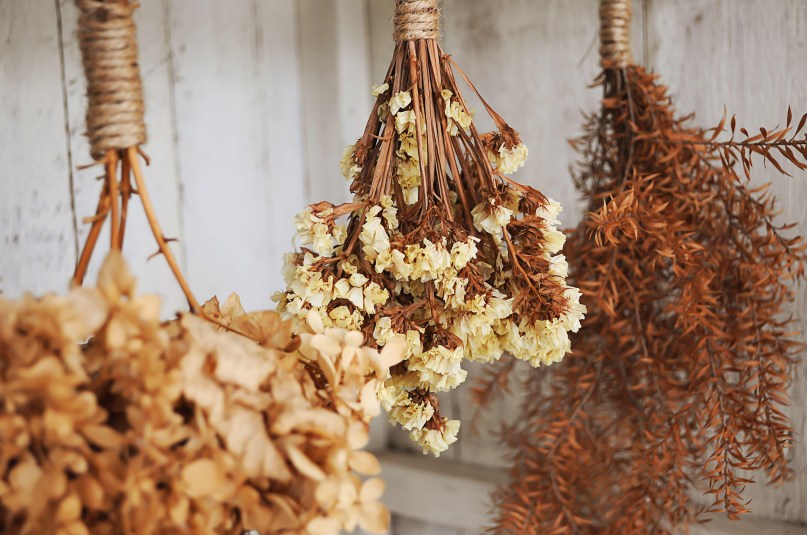
How to Dry Flowers Upside Down
Drying flowers by hanging them upside down is an old-fashioned method that’s best for people who want don’t want to bother with complicated instructions; all you have to do is hang your flowers and wait. If you want to use this flower-drying process, you’ll first need somewhere dark and cool to store your flowers. A basement or an attic are ideal, but you can also use an empty closet. Finding a location that gets good air circulation and doesn’t receive a lot of light is very important because it’s the key to figuring out how to dry flowers that keep their color. Here’s how to dry flowers upside down in five easy steps.
- Clean your flowers by removing any debris, like extra leaves. Cut the stems to the desired length, making sure there’s at least six inches of stem left.
- Take unscented dental floss and tie it around the base of each stem. You want tie each stem towards one end of the floss rather than in the middle so that you have a lot of excess string on the other end.
- Tie each flower to a clothes hanger using the opposite end of the floss. The flowers should hang upside down, with the blooms at the bottom.
- Leave your flowers alone for two to three weeks or until they’re completely dry.
- Remove your flowers once they’re dry and spray them with unscented hairspray so they hold their shape.
How to Dry Flowers in the Oven
If you’re feeling crafty and you need a big batch of dried flowers, it’s best to dry flowers in the oven. With the holidays approaching, a heartfelt handmade gift — like a batch of potpourri or a wreath — would make anyone’s day. So instead of waiting a few weeks for your blooms to shrivel up, speed up the process by popping a couple dozen flowers in the stove all at once.. In a matter of minutes, you’ll have beautifully dried flowers that are ready to shine in any craft you add them to. Feeling inspired? Here’s how to dry flowers in the oven in four easy steps.
- Cut off the entire stem of each flower so there’s only the top portion with the petals remaining.
- Arrange the flower tops on drying racks.
- Heat the flowers in the oven on the lowest setting for between an hour and a half to two hours, depending on how warm your oven is. Check on the flowers every half hour, and remove the ones that are already dry. Because small blossoms will dry out faster than larger blooms, you’ll need to be vigilant in making sure that the little ones don’t burn.
- Let the flowers cool. Once they’re cool and dry, they’re ready to be used for crafting!
How to Dry Flowers in a Microwave
But what if you want to dry your flowers with the stems attached — how do you do that quickly? That’s where a microwave comes in handy. The first things you’ll need are some microwave-safe containers that are big enough to hold your flowers, stem and all. There are a few methods you can follow when it comes to drying flowers in a microwave: one involves silica and the other uses cat litter. We’ll cover both, but let’s start with how to dry flowers with silica gel, which you can buy at Home Depot, Target, or online ($11.90, Amazon). Here’s how to do that in eight easy steps.
- Cover the bottom of a disposable container with about an inch or two of silica gel beads. (You may need a little bit more than this if you’re working with a large flower.)
- Place the flower face up on the silica gel and cover the petals with more beads, but be gentle so as to not crush the flower petals.
- Leave the container uncovered and put it in the microwave. Finding the right heat setting will require a little trial and error, but start with two heat settings above defrost. Zap the flowers for two to five minutes, checking on the flowers periodically. Keep in mind that some flowers, like roses, can withstand higher heat, while flowers like daisies are more sensitive.
- Open the microwave and immediately cover the container with its microwave-safe lid once the flowers appear dry.
- Take the container out of the microwave and remove the lid of the container about a quarter of a centimeter.
- Let the flowers sit for at least 24 hours.
- Dust off any silica gel from the petals and lightly mist with an acrylic spray, which you can buy at any craft store.
- Toss out your containers.
If you’d prefer not to use silica gel or you don’t have any on hand, cat litter is a handy alternative. The nice thing about this method is that you can reuse your containers — although we recommend giving them a good scrub! And if you have a cat or two at home, you should have plenty of cat litter just laying around (seriously, why do cats always kick their litter everywhere but in the box?) Here’s how to dry flowers in the microwave without silica in three easy steps.
- Place your flowers in a microwave-safe bowl and cover with four cups of kitty litter. You can do this one flower at a time, or in larger batches.
- Zap for two to three minutes on high heat.
- Let the cat litter cool before removing the flowers from the bowl.

Now that you’re a flower-drying master, you can teach all your friends and family how to dry flowers. All that’s left now is finding the perfect place to display your beautiful bouquet so your blooms can brighten your room all through the year!
More From Woman’s World
These Grocery Store Flowers Will Last the Longest
Prosperity, Protection, and Positivity: Plants That Bring Wonderful Energy