These 4 Chest Exercises Improve Posture and Boost Arm Strength in Women
Tone your chest in the comfort of your own home.
An important part of maintaining a consistent workout routine is the ability to exercise at home — because who has the time to commute to the gym every day? And if developing strong, shapely, toned chest muscles is one of your goals, there are several exercises you can do with little to no equipment and limited space. (Strengthening the chest keeps upper-body muscles in balance, which improves posture; and makes everyday tasks like carrying groceries and opening garage doors easier by powering shoulders and arms.)
The following four exercises are designed to target different parts of your chest, so depending on your goals, you could combine some or all of them into your fitness program. Just remember that Rome wasn’t built in a day: If you’re a beginner, start slow and work your way up to a full chest workout. And don’t forget to drink plenty of H2O to keep yourself adequately hydrated.
1. Barbell Bench Press
Chest exercises are a great way to get strong, defined muscles, and the barbell chest press is one of the most effective among them. This workout targets the pectoralis major muscles, but it has the added benefit of engaging your shoulders and triceps.
As the name implies, you’ll need a barbell to get started. We recommend beginning with five to 10 reps if you’re new to this workout. We also recommend working with a spotter for safety, whether you’re new to lifting or a long-term pro.
- Starting position: Begin by lying on your back on the bench under the rack that holds the barbell. Your barbell should already be set up on the rack. Be sure to choose a lighter weight to start out as you get comfortable with proper form.
- Place your feet flat on the floor slightly wider than hips-width distance apart, and maintain a neutral spine. Your eyes should be roughly aligned with the front of the barbell rack uprights.
- Grasp your barbell with an overhand grip, meaning your palms are facing away from you. Your arms should be slightly wider than shoulder-width apart. Pinch your shoulder blades together to prevent yourself from pressing with rounded shoulders.
- To execute: Remove the barbell from the rack, and inhale while lowering your bar to your chest. The bar should be at nipple level, and your elbows should be bent to the side roughly 45 degrees away from the body. Exhale as you extend your arms to press the bar above your chest. This is one rep.
There are plenty of variations on this exercise that can help you target muscle groups more specifically, too.
The Incline Bench Press
Performing a bench press on an incline specifically targets upper chest muscles, making it an easy swap when you feel like your upper pecs need a little TLC.
The biggest change you need to make here involves your bench’s setting — changing it to a 15 to 30-degree incline. (Some fit pros will even suggest a 45-degree incline, which engages the shoulders even more. It all comes down to your comfort level since everyone’s anatomies are different.) Performing this exercise with a set of dumbbells is preferable (as opposed to a barbell), and choose weights that are lighter than what you would use for a flat bench press.
- Starting position: Sit on your bench and lean back, keeping your back flat and your neck relaxed against the bench. Plant your feet flat on the ground. Hold a dumbbell in each hand, and position your hands at your shoulders with bent elbows. (Your elbows should be angled below your ribs.)
- To execute: Engage your core, and exhale as you press your dumbbells up. (Your weights should be moving in a straight line over your chest with your arms perpendicular to the ground.) Next, inhale to lower your dumbbells back to starting position. Keep your elbows close to your sides, at a 45-degree angle, and pointing towards the floor (rather than letting them splay out to the sides of the room).
Start with one set of eight repetitions, and work your way up from there. When you’re done, don’t drop your dumbbells — safely exit the exercise by sitting up and placing your dumbbells on your knees before you stand.
The Decline Bench Press
The decline press is another great workout, this time targeting the pectoralis minor (aka the lower pecs). The lower pecs is a major muscle group that’s often neglected in traditional upper body strength exercises. For safety, perform this exercise with a spotter or certified personal trainer. The latter can also recommend the correct grip width for this exercise, as it’s often executed using a barbell rather than dumbbells.
Opposite to the last exercise, you’ll want to set your bench on a 15- to 30-degree decline. This is a more challenging exercise than the incline or flat bench press, so work your way up to this one after you can safely and confidently perform the other incline variations.
- Starting position: Plant your feet flat on the floor at the end of the bench, and lie such that your eyes are directly under your barbell. Your palms should be facing forward as you grip the bar. (As mentioned above, consult a fitness professional to learn the grip width that’s right for you. When in doubt, try slightly wider than shoulder-width apart.) Begin with your barbell over your shoulders with elbows just shy of locked.
- To execute: Inhale as you lower your barbell to mid-chest with your elbows at a 45-degree angle away from your body. Pause, then exhale and lift the barbell back to starting position. This is one repetition.
Typically, you’ll want to do three to five sets of 12 reps. However, if you’re new to weightlifting, be mindful of your learning curve — start small and work your way up.
2. The Push-Up
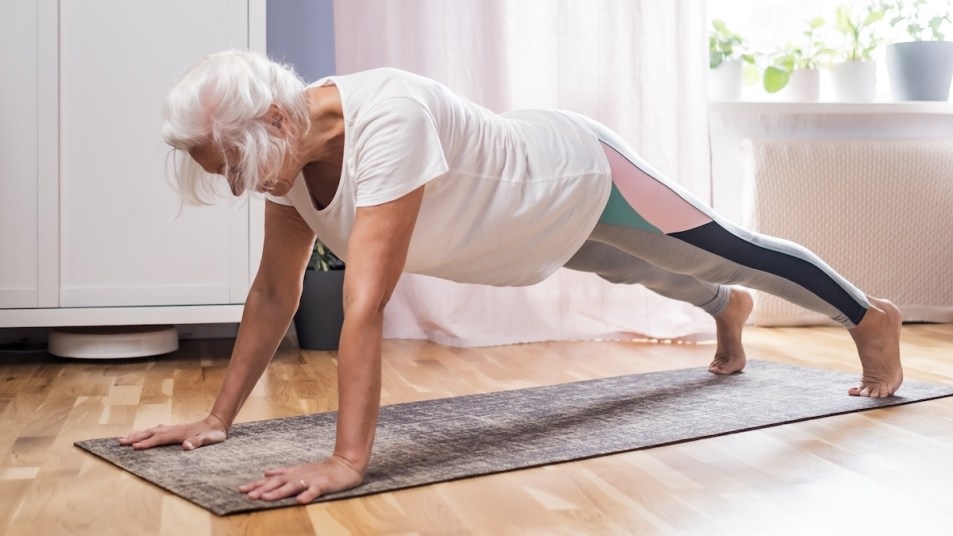
This upper-body workout is more like a full-body exercise: The push-up targets the pectoral muscles and strengthens the triceps, the muscles around your shoulder blades, and your core. Plus, it’s a bodyweight exercise, so you don’t need any equipment to perform this at home.
- Starting position: Begin in a plank position with your hands and feet shoulder-width or slightly wider than shoulder-width apart. (You should be balancing on your hands and toes, and your legs should be straight behind you.) Envision drawing a straight line from your heels to the top of your head. Position your gaze a few inches in front of your fingers to lengthen your neck.
- To execute: Engage your core and glutes to protect your lower back. Inhale as you bend your elbows to lower your body. Aim to bend your elbows to a 90-degree angle. Exhale as you press down through your palms to push your body back up to the starting position.
If starting from a full plank is too challenging, perform the push-up rep with your knees bent. In this version, you will be in a modified plank position with your knees resting on the ground. There’s no shame in perfecting your upper-body form before going to a “full” push-up from a plank position — in fact, this is recommended for beginners.
3. The Wall Press
Also called wall push-ups, the wall press is a push-up variation that can be extremely effective for people who have trouble executing a standard push-up. This variation reduces some of the resistance caused by gravity, making it easier to focus on correct form. The wall press is a great way to target the upper chest muscles. Just be prepared to feel the burn.
- Starting position: Stand roughly an arm’s length distance away from the wall with your feet hip-width apart. Your palms should be flat on the wall, at shoulder height and shoulder-width apart, with your fingers pointing up. Essentially, you’re replicating a plank position while standing. As such, you must ensure that your spine is neutral and protected by engaging your core and glutes.
- To execute: Executing a wall press is similar to executing a push-up. Inhale as you bend your elbows to bring your chest towards the wall. Stop when your upper arms are parallel with the wall — your arms should be bent at a roughly 90-degree angle. Exhale as you press yourself back to your starting position. This is one rep.
4. The Reverse Chest Fly
The reverse chest fly is a useful exercise that can help tone your upper back as you strengthen your chest muscles. While some people use resistance bands for this workout, you can also use a set of dumbbells.
- Starting position: Stand with your feet shoulder-width apart. Bend your knees slightly and send your hips back, so your chest is nearly parallel to the floor. (This is called a hip hinge motion.) Hold one dumbbell in each hand with your palms facing each other and your arms hanging straight down from your shoulders. Engage your core, and ensure your back is in a straight line from your hips to the top of your head to protect your lower back.
- To execute: Exhale and raise your arms up and out to the sides, almost as if you have wings. Keep a slight bend in your elbows, and pinch your shoulder blades together. Inhale, and lower your weights back to your starting position. This is one rep.
Make sure that you don’t lift your weights beyond shoulder height and keep your core engaged throughout the exercise. If you’re still getting used to this movement, you can alternate lifting your right hand and left hand for a slightly easier workout.
You Go, Girl!
So, there you have it! These four exercises will put you on the path to a strong chest and core. Whether you prefer a home workout or want to take these useful tips and tricks to your local gym, remember that these exercises will become easier over time. When you no longer feel the burn, that’s a sign to add a little extra weight or a few more reps. Strength training tends to hit multiple muscle groups on one movement, so if you play your cards right, you can add this to your favorite daily routine for a full-body makeover that’s going to feel fabulous. You’ve got this!


